Daydream 31: Tall Gray World[]
Features[]
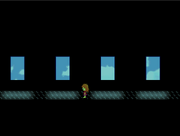
It starts on a bridge to what appears to be a building, with various eyes passing around. Going up into the door will make the screen flash black, but nothing more happens.
In the building, there are several floors of grey ground against white wall. There is also furniture equally as gray,
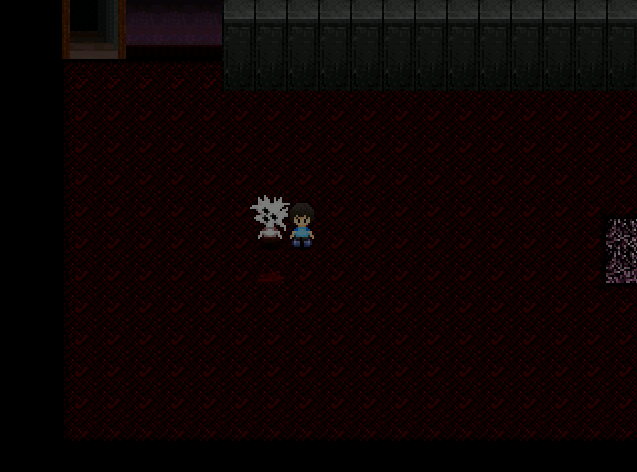
Thomas at the Third Layer (by fall)
such as pictures, closets and chairs (though most of them are occupied by black stickfigures). The second floor has a TV, which houses the first layer memory. Another thing is that although the floors lead down, the next area shows a rooftop.
In said rooftop, there is a bridge, alongside the 2nd layer memory (a bunch of static) and the same stickfigure. Going into the bridge shows a next area, which has legs on a white background, a piece of floor with a sign, a bgm which contains gibberish, and going further right shows an alligator.
If the sign is interacted with, it will show a cutscene where Thomas falls onto the darkness. But do not worry, he actually falls near the area of the Third layer memory, which can be accessed from the crocodile head too, but the way is longer.
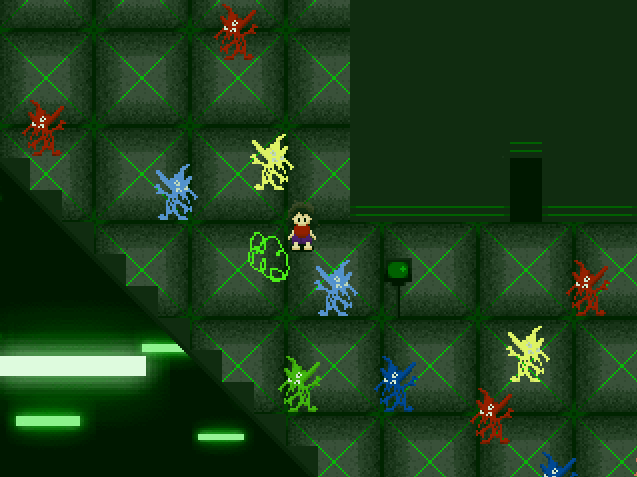
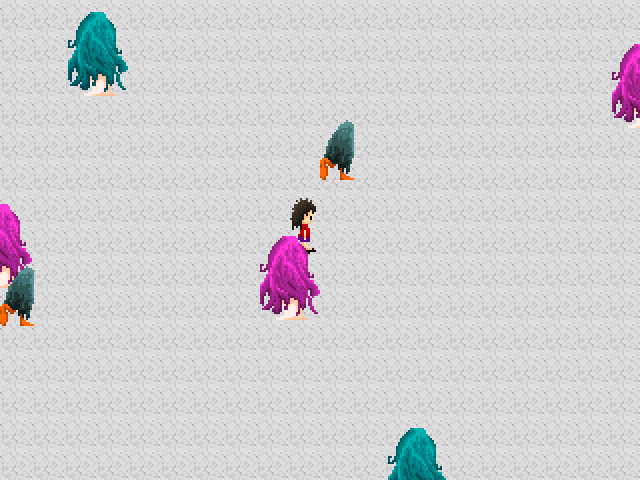
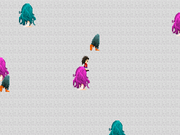
The world from the crocodile head is mostly dark, with technicolor holes and weird blue and red creatures which communicate through beeps. There are three symbols on the world: a white triangle formation (teleports back from the crocodile mouth), three rectangles (a corridor to the Third Layer memory), and a red triangle formation (a sunflower garden). In the Third layer memory area, the memory is seen walking around, with the same red and blue monsters, arranged in pairs, on the background.
In the Sunflower garden (4th layer) there isn't much to do except keep going forward and interact with the egg statue.
Layer links[]
1st layer to 2nd layer: Door
2nd layer to 3rd layer: Sign/Crocodile mouth
3rd layer to 4th layer: Red triangle formation
Memories[]
1st layer: Portrait
Description: A really nicely drawn portrait.
Location: Interact with the TV at the second floor at the building.
2nd layer: Glitch
Description: 124352135123532rewtrqewt13trqewtrwefdsfdsag
Location: On the rooftop.
3rd layer: Popon
Description: Dance!
Location: On the technicolor area, after the hallway.
4th layer: Statue of Egg
Description: What is that message?
Location: On the Sunflower garden, at the end.
Trivia[]
- The writing on the 4th layer memory's event is in japanese. Translating it:
Hey.
I'm an egg.
No, really, I'm an egg.
Were you expecting something useful this time? Idiot.
Filler: Nai (x72)
"The idyllic Sun holiday"
- Said phrase in quotes at the end leads to this.
- This is one of, if not the only daydream where there are more than a way to reach a certain area.
- All of the monsters at the third layer have different beep patterns.
Daydream 32: The Desolate Laboratory[]
Features[]
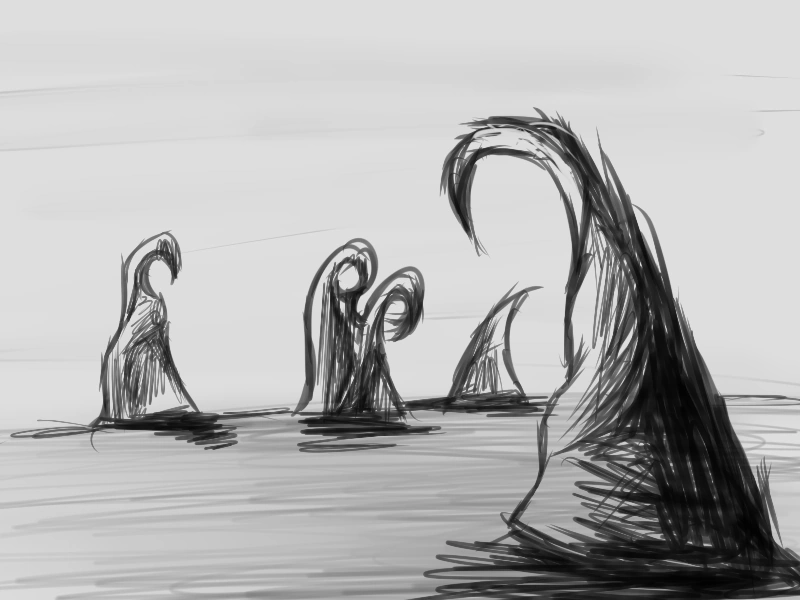
The area is a grey foggy place with gray mountain/formations on it. There is a smaller mount that eventually leads
Thomas at the laboratory.
to the 1st layer memory and a door that takes to a sepia-colored laboratory.
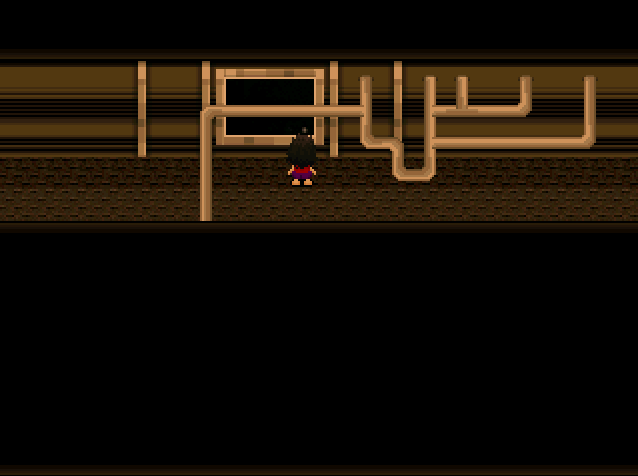
Said laboratory has a futuristic tone with it although it seems abandoned, with tubes and several rooms. The second room contains some computers, that if interacted, teleports to a computer room (which bgm is only a dull beep) with several discarded-looking computers.
The third room has the same rock formation seen in the first area that takes to the experiments room. In this room, it is dark, with various sepia pods showing up, most of them broken, or with what appears to be black goop on them. At the end, the pod having the 3rd layer memory is located.
If the door at the fourth, smaller room is opened, a very bizarre event will play, in which, the 4th layer memory is obtained.
Layer links[]
1st layer to 2nd layer: Computers
1st layer to 3rd layer: Stone formation
1st layer to 4th layer: Door
Memories[]
1st layer: Crash course
Description: You're lucky it didn't involve missiles.
Location: Interact with the smaller rock at south and left of the starting place, then go right and interact with the smaller pot.
2nd layer: SSOD
Description: It's like a BSOD, but brown-like.
Location: On the computer on a wall at the computer room.
3rd layer: Experiment
Description: It seems to be alone, the poor thing.
Location: On the pod at the end of the experiments room.
4th layer: Smile
Description: Hello smiley face! Hello smiley face!
Location: After the last door.
Trivia[]
- This is one of the few daydreams that has concept art (at right).

- SSOD was based on BSOD. In fact the message says even to press X or Enter to exit the daydream.
- The event that gives the 4th layer memory was made because on a comment at a video describing one of Yume 2kki's events said that those kind of games couldn't be weirder than that.
Daydream 33: Pastel Mislead[]
Features[]
The daydream begins with a grassy field with various trees, flowers and dirt roads while some piano keys plays.
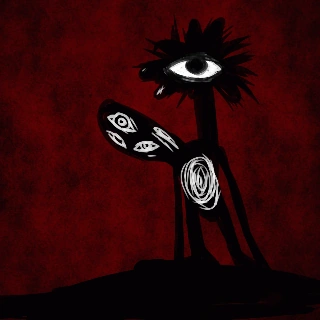

The monster that gives the 4th layer memory.
Going south shows a blue chair and a multicolored post. The former leads to the 1st layer memory area, which contains a cardboard moon. The latter leads to the 2nd layer, which is a room filled with pink, green, blue and yellow, with chairs colored accordingly, some blocky-looking trees, somewhat silly music, purple carpet, blocks that float, and some half-pink half-blue rabbit NPCs.
Going into the blue blocks over the purple structure with trees. teleports the player to a looping corridor with chairs and two doors. The checker tiles one leads to the throne room, which contains the 2nd layer memory. Said room contains various floating blocks, similar to the ones found at the first room and two thrones. Thomas will refuse to sit in the black one and the red one is the 2nd layer memory.
If the Blue Passage is chosen, it will take to some sort of a waiting room with various chairs and two doors. The first black door leads to the 3rd layer memory, which is an event. The last black door teleports to a different version of the first area, which has a hovering block at the center which takes to the fourth layer.
The next area is a painted rainbow, but after some steps, the screen turns vivid red and the rainbow ends up cut down and bleeding while black roots spread. Then, after passing, it shows an enormous monster, that if interacted, the screen pans up, it awakes, and it shows the 4th layer memory event and gives said memory.
Layer links[]
1st layer to 2nd layer: Multicolored Post (south and left)
2nd layer to 3rd layer: Door
3rd layer to 4th layer: Hovering block (center of the map)
Memories[]
1st layer: Cardboard moon
Description: That's no moon...
Location: Interact with the chair at the field, then go north.
2nd layer: The throne
Description: Hail to the red king, baby!
Location: At the checkered door at the purple corridor.
3rd layer: Trenchcoated man
Description: This has bad implications.
Location: On the Blue Waiting Room, at the first black door.
4th layer: Vivid
Description: A bedroom.
Location: At the very last area, interacting with the monster.
Trivia[]
- The monster that gives the 4th layer memory later appears at Daydream 37.
- The daydream is full of Shout-outs to LSD: Dream Emulator, more exactly, the "Happy World" area.
- One of the bgms of the 4th layer memory, choke, was made by the author choking itself, then modifying the sound.
- Mislead was based upon a certain image of a book the author found.
Daydream 34: Scribble People and such[]
Features[]
The starting place is made of words where things should be. Two other things are shown there: a notebook, and

Choosing some music.
the letter A (1st layer memory). Said notebook is located at the south of the starting point.
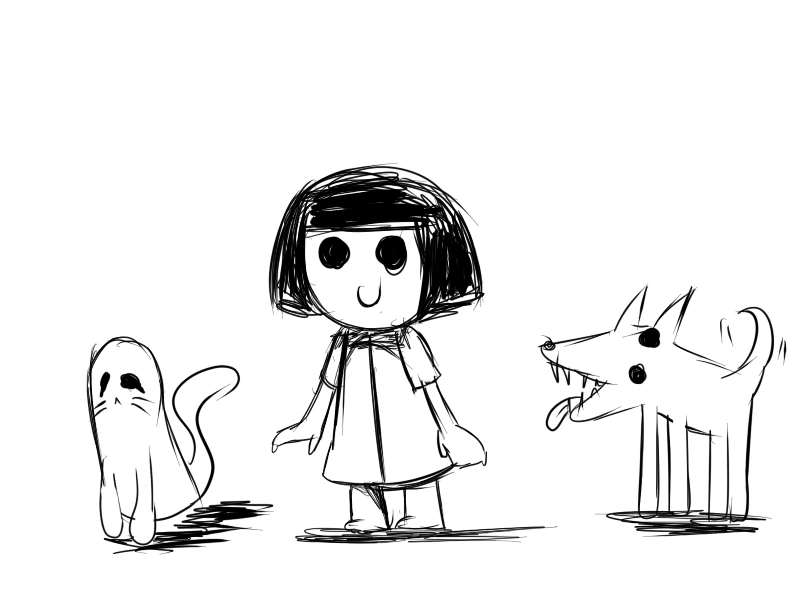
The notebook leads to a scribble area, with various drawn but monochrome things, such as flowers, a house, a well, and its NPCs, which are rather simple, and are a earless two-legged cat, a two-eyes in the same part of the face dog, and a little girl who follows Thomas around. Nearby, there are three scribbles that do nothing but play a beep. If the well is entered into, it will show a monster on a different art style which contains the 2nd layer memory.
If the house is entered, it will show three ways. The left way has a crudely drawn bedroom with a stereo system that can play some bgms of whichever Thomas chooses. The right way leads to a corridor, then to a room with an arm, that if interacted with, brings a hand and the same little girl. Interacting with her brings an event and the 3rd layer memory.
If the south way is entered, though, it will show an area with a field filled with flowers, Me herself, and a pin cushion. If Thomas goes up at a minimum of six tiles, then attempt to exit, an event will play and the 4th layer memory will be obtained.
Layer links[]
1st layer to 2nd layer: Notebook
2nd layer to 3rd layer: Arm
'2nd layer' to 4th layer: South passage
Memories[]
1st layer: A
Description: aaaaaaaaaaaaAAAAAAAAAAAAAAAAAAAAAAAAAA
Location: Going away at the north.
2nd layer: Deep on the well
Description: Back to the very well.
Location: Enter the well and interact with the monster.
3rd layer: Little girl
Description: Always the little girl.
Location: On the separate room by going in the right passage and interacting with the arm at the next door.
4th layer: Gone
Description: They're gone... gone... gone...
Location: In the house, go at the door located south.
Trivia[]
- This is one of the few daydreams that has concept art, or more exactly, character concept art. (Shown right)


Said concept art.
- The Me that appears on the daydream is slightly different from the actual one.
- The bgms that can be chosen from the system are, respectively: bgm100, bgm1, bgm69, bgm5rev, bgm56, bgm51b, bgm50rev, bgm47, bgm39, bgm33, bgm30, bgm26, bgm23, bgm11, bgm71, bgm76, bgm82c, bgm99, bgm40, bgm32, bgm52, and bgm60. Most of those comes from the daydreams done prior to this one.
- The first area is another reference to LSD: Dream Emulator.
Daydream 35: Area 8[]
Features[]
The area is a looping amount of blue blocks. Some of them have passages. Taking the door at the line where the

The digicity is lively today.
starting point is located will lead to a small path filled with round rocks and the 1st layer memory. If the door at the line below the starting one is taken, it will teleport to the path to digicity (2nd layer).
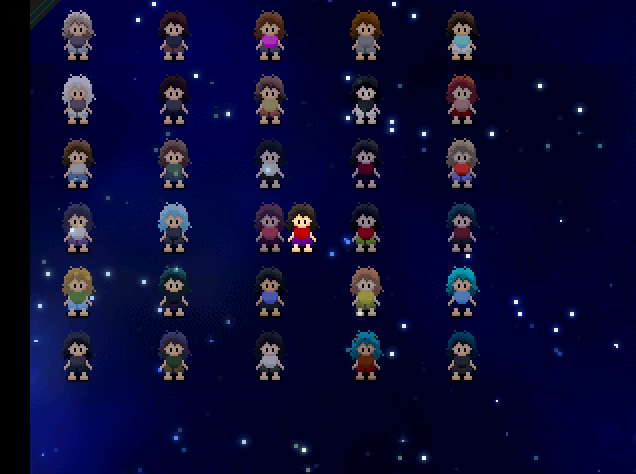
Said path has some digital-like music, several lampposts and a background consisting of lines. Following around takes to the aforementioned digicity, which contains an enormous building, several monsters, similar to the ones found at Daydream 31, and a room where Thomas's palette can be changed to various Yume Nikki fangame protagonists.
Entering the building will unveil dark corridors, with various non-opening doors and monitors. The very last door, at top right, teleports to a room with various masked people which meow like cats even if they aren't cats and a window-door. Looking onto it shows the outside of the room, with W.T standing there. Exiting the view brings another version of the same room, in which several legs and heads sprout on the room, holes appear, there are different monsters, the 3rd layer memory is there, and there is a talking sign that turns the room back to normal.
If the distorted room is exited, it will show a different corridor with a door containing the event that gives the 4th layer memory.
Layer links[]
1st layer to 2nd layer: Passageway
2nd layer to 3rd layer: Door
3rd layer to 4th layer: Passageway
Memories[]
1st layer: Sunglasses
Description: 8)
Location: Go onto the door at the line of the starting point, then go onto the next room.
2nd layer: Scribbles
Description: I don't get it. And you?
Location: On Digicity.
3rd layer: Squid
Description: A glitched one, I add!
Location: On the distorted room at the building.
4th layer: Tearing off
Description: Your eyes.
Location: At the other room at the building after the distortion of the 3rd layer room.
The pallete change room.
Trivia[]
- The palette change room contains various references to various Yume Nikki fangames, boiling even to the names of the palette themselves.
- This daydream also features the same monsters that appear at the 31st daydream. Likewise, they all have different beep patterns.
- The 4th layer memory event has a pretty rare moment of W.T actually smiling.
Daydream 36: The Computer[]
Features[]
It begins with Thomas on a desktop, which has two folders and a button at bottom left that changes the wallpaper

Thomas at one of the folders.
randomly. Going into the folders will show some texts, bmg and images. If the inside folder of the folder located right at the desktop is interacted upon, it will corrupt the entire computer. Document files become gibberish, the music becomes static and the pictures are unreadable. If that folder is exited from the upper left corner button, it will show a modified version of the desktop, but the internet connection icon will be available, leading to the next area: a purely digital landscape with diamonds (there is a line of seven that functions as some sort of piano), one darker diamond that leads to the 1st memory area and a light-colored diamond that leads to the next layer.
Said layer is peacefully light purple, with teleporting being made by spinning diamonds that play a piano sound, lamp posts that emit lovely lights, a soundtrack of cute chimes, and a bathtub filled with blood, which is the 2nd layer memory, found later in this same area. After a bit of teleporting through diamonds, a path shows up and it shows a blue-colored version of the area. Some more teleports later, it shows a fork with two paths.
Going left leads to the 3rd layer memory, surrounded by easily destroyable flowers. Going right leads onto the 4th layer memory instead.
Layer links[]
1st layer to 2nd layer: Diamond
2nd layer to 3rd layer: Passageway
3rd layer to 4th layer: Right Passageway
Memories[]
1st layer: Toilet
Description: Toilet toilet toilet!
Location: Interact with the separate darker diamond. It will take to the memory.
2nd layer: Blood bath
Description: No, this does NOT make you younger.
Location: On the Purple Glass area.
3rd layer: RGB Mist
Description: A mist that changes colors. Pretty, isn't it?
Location: On the fork at the Blue Glass area, go left.
4th layer: Axis drone
Description: No description available.
Location: On the fork at the Blue Glass area, go right.
Trivia[]
- The first area is a reference to Someday.
- The 4th layer memory, similar to the 4th layer memory of daydream 32, was made because on a comment at a video describing one of Yume 2kki's events said that those kind of games couldn't be weirder than that.
- Similarly, Axis Drone was considered too bizarre even for its creator.
Daydream 37: Daily sewers[]
Features[]
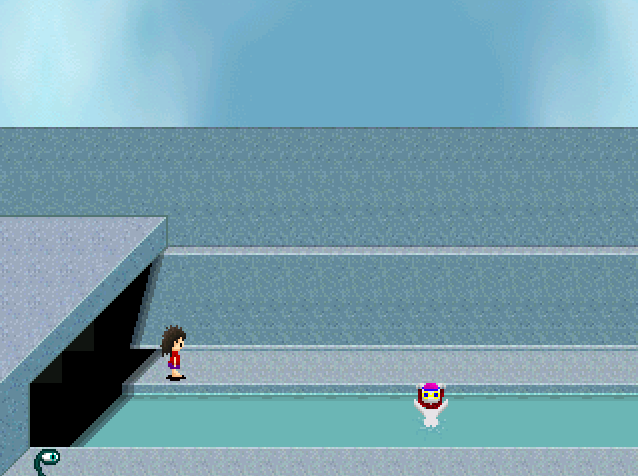
The area seems to be based on a open sewer at plain day. Going left shows the insides which either leads to a

It doesn't add much...
cart or a door with stairs and several jelly creatures and a guy which gives the 1st layer memory. If the cart is ridden upon, it leads to a long path that finishes in the wilderness: a place with gray-colored floor, statues of what appear to be lowercase "i"s and weird metal creatures show up abound. A group has the 2nd layer memory. Touching a cloud leads to the sky, which has the 3rd layer memory.
If the right path is taken, on the next area, a cutscene will show up where a white monster (Galaxte) jump from a ledge in order to submerge in the water. Going forward and entering will show Vividry, a monster that wants a small sprout if the player wants the 4th layer memory. Afterwards, going onto the door after the fetch quest is enabled will lead to a room, which teleports to a bridge, gaining access to an otherwise inaccessible area of the sewers. After picking the sprout up, Vividry will grant the memory in an event.
Layer links[]
1st layer to 2nd layer: Passageway
2nd layer to 3rd layer: Cloud
1st layer to 4th layer: Passageway
Memories[]
1st layer: Sandwich
Description: They're delicious and replenish your health! Nom!
Location: At the first area in the left, go into the door and the stairs.
2nd layer: Shadow
Description: The lack of light makes one.
Location: At the wilderness, heading right onto the third i and heading down.
3rd layer: Prism
Description: This is how you make an artificial rainbow.
Location: On the sky area, go onto the rainbowed cloud.
4th layer: Sprout
Description: Here's how you met your best friend.
Location: Do a fetch quest for Vividry at the far right area.
Trivia[]
- The 1st layer memory could be a reference to Team Fortress 2, where sandwiches are used to replenish health, along with the Heavy saying that they are 'delicious'.
- Judging by Vividry's appearances in this daydream and Daydream 33, it is very possible that it is a psychic.
- Interestingly, while the rest of the memories are relatively hard to obtain, the 4th memory is one of the easiest to do.
- Another thing is that the 4th layer memory event shows a smaller Thomas and Me, implying that the relationship between them have been there since their childhood.
Daydream 38: Sky pieces[]
Features[]
The starting area consists of a pure black world with large sprawling holes that contains a piece of the Sky.
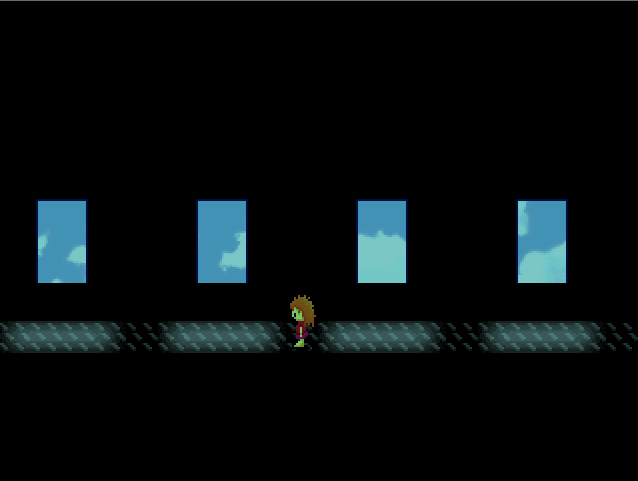
Colored Thomas at the corridor.
Thomas, in this daydream, is way more brightly-colored than usual. There is also some ladders to go from piece to piece.
If a red sign is interacted with, it leads to a dark corridor. Going ahead instead of interacting with the piece of metal teleports to a rather light sky place, with lots of red signs, and a Sky person sitting at the end. If Thomas sits near said Sky person, an event will play as soon as the player press Z or enter. A particular sign, separated from the others at this area, teleports Thomas to the 3rd layer memory area.
If the piece of metal is interacted with, it will show a grey and foggy, rusty area, in which spikes litter the place, and at certain areas, a cutscene will play of a shadow walking across the room. Later rooms show hearts impaled at the spikes, and eventually, the 4th layer memory is found.
Layer links[]
1st layer to 2nd layer: Passageway
2nd layer to 3rd layer: Sign
1st layer to 4th layer: Piece of metal
Memories[]
1st layer: Sky person
Description: A person made of a cloudy background.
Location: At the first area, between two monsters.
2nd layer: Floating
Description: Flying.
Location: After sitting with the Sky person at the second area.
3rd layer: Red Tint Self
Description: Strangely, it's upside down and faceless...
Location: Interact with the separated sign at the second area.

The concept art.
4th layer: Uncertainty
Description: Why is everything fading?
Location: At the corridor, interact with the metal piece, then work your way through the next area.
Trivia[]
- The 2nd layer memory's event has Thomas riding what could be either an Azalea or a Cammelia.
- This daydream is also one of the few that received concept art.
Daydream 39: Sandy Hair, Salty Bath[]
Features[]
The beginning area starts with a world filled with hairy creatures, heads with hair around, and a rather cheery bgm.
Thomas at the starting area.
Interacting with a brown-haired head teleports you to an enclosed area, with a Teal hair that shows the 1st layer memory or a door leading to the bathhouse.
Said bathhouse is dark, has some bubbles on the ground, and a few doors, most of them being locked, and one female room being definitely not empty. One of the doors is open, showing a bathtub, and a coat hanger with a swimming cloth with it. This leads to the 2nd layer memory, which is a nasty surprise.
Going from this room leads to the interior, which, in contrast to the other room, is more brightly colored, and has bubbles around, along with the 3rd layer memory laying down amongst the way. Interacting with a button takes you to an inside of a shampoo bottle, which can be climbed by interacting with a bubble. A cutscene later, it will show the top of said bottle, with a shower (it is even raining) and a duck. Interacting with said duck leads you to the bright room of the bathhouse, only that you will be riding a duck in the water. At this point you can't return to the anterior areas, so it is recommended for you to save before interacting with the duck.
Heading to the door at the top brings an event that will give you the 4th layer memory.
Layer links[]
1st layer to 2nd layer: Passageway
2nd layer to 3rd layer: Passageway
3rd layer to 4th layer: Duck
Memories[]
1st layer: Pine dance
Description: An age old dance, done and shown to you.
Location: At the path to the bathhouse, interact with the teal/cyan-colored hair head.
2nd layer: Hot tub
Description: It's so warm...
Location: Go into the open room at the bathhouse and interact with the coat hanger.
3rd layer: Soap
Description: You dirty-mouth.
Location: Laying around in the pink bathhouse.
4th layer: Flushed
Description: Poor Ducky...


Thomas with Ducky.
Location: Go to the door when riding a duck.
Trivia[]
- The bgms for the first area and the first memory event (bgms 129 and 130) has somewhat similar notes to War of the Words
- The duck of this daydream (Ducky) also features in some art with Thomas. (At right)
- There are two memories called Soap, though they have different layers. (One is on Daydream 30)
Daydream 40: School building[]
Features[]
This time, Thomas is at a school and is younger. The whole building is fairly straightforward, with several corridors

Thomas near Paleper.
and some rooms filled with Sky persons, similar to the ones at the 38th daydream. Despite the state of decay of the building, there are futuristic-like doors. The third door at the first corridor full of lockers teleports to the 1st memory area.
On the next corridor, which is full of lockers, an open locker (indicated by a green scribble near it) leads to the inside: a small, enclosed area with a smoke which leads to a foggy area. Near it, there is a weird black structure that will lead to the 2nd layer memory.
Going from the corridors will take to a purple room with a monster (Paleper) and a bunch of what is assumed to be debris. The monster makes an 8-bit sound. If the debris is interacted with at an certain area, it will make the monster feel bad. If the monster is interacted while Thomas is in front of it and if it feels bad, it will vomit and give the 3rd layer memory.
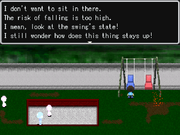
Proceeding from the purple room, it shows a small playground with some Sky person running around, a rusted swing (Thomas will complain about it if interacted with), a sandbox and some orange noise. Interacting with the latter brings to the Orange city, and going forward leads to the 4th layer memory area.
Layer links[]
1st layer to 2nd layer: Locker
1st layer to 3rd layer: Door
3rd layer to 4th layer: Orange Noise
Memories[]
1st layer: Seal
Description: Don't touch that, you idiot!
Location: On the first corridor with doors, go at the last one.
2nd layer: Smoke
Description: Smoke. Smomomomomo...
Location: On the open locker (indicated by a green scribble near it), go into it and interact with the smoke which leads to a foggy area. Near it, interact with the weird black structure.
3rd layer: Vomit
Description: Eeeew...
Location: Interact with the Debris at the purple room, then at the front of the monster nearby.
4th layer: Orange
Description: Sour, but sweet.

You say it, Thomas. You say it.
Location: On the Orange city (Orange Noise)
Trivia[]
- This is what Thomas complains when interacting with the rusted swing (image at the side)
- The 4th layer memory and the 1st layer memory of the First daydream could be considered Book Ends.
- This is one of the few daydreams where Thomas starts out differently. It also shows that he didn't always have long hair.