| Game | Walkthrough | Gallery | Theories |
|---|
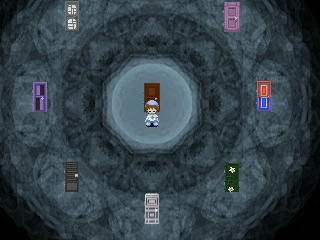
Overview[]
This is the walkthrough page for Debris. The game is complete so far with 4 endings and a total of 17 effects (not including the instructions). If you see any incorrect/missing information, please let us know or edit this page.
Effects Guide[]
In Debris effect actions are activated with the Shift key. Some effects require others to be collected first to use a specific power. Many events require the use of effects as well.
Sewing Scissors (たちばさみ)[]
Holds a pair of sewing scissors.

Appearance: Tatsuki wields a pair of scissors.
Passive Effect: NPCs may move away from them.
Action: (Shift) Tatsuki snips the scissors.
Location: Found at the School.
Practical Uses: Can be used to kill NPCs and trigger certain events. Killing NPCs may occasionally result in obtaining money.
Go to the Glass World. Go north-west until you reach three blue bouncing shapes. Head left until you reach a row of glass gates with a visible gap between them. Walk through the space in the middle to be teleported the School. At the School, go right until you see the first open door and enter it. Go into the last door on the left and talk to the gray man inside to get the effect.
Upside-Down (さかさま)[]
Becomes upside-down.

Appearance: Tatsuki becomes upside-down.
Passive Effect: None.
Action: (Shift) Tatsuki spins around.
Location: Found in Grass House.
Practical Uses: Using this effect near certain NPCs shows their true identity while Tatsuki spins, and can occasionally be used to trigger events.
Go to the Gray Ash Hole World. Go down into the face. In the Grass House go on the second corridor and go into the second-to-last door. Interact with the weird eye plant to get the effect.
Mouse (ねずみ)[]
Becomes mouse.

Appearance: Tatsuki turns into a mouse/small rat. Also can be Tatsuki in a rat costume.
Passive Effect: Tatsuki travels at double them walking speed.
Action: (Shift) Tatsuki's appearance alternates between a human and a mouse.
Location: Found in Purple-Black World.
Practical Uses: Can be used to travel through the dream world much faster, chase fast-moving NPCs, and escape from chasers more easily. Tatsuki's speed is doubled no matter if they is in the mouse form or in human form.
Go to the Purple-Black World. Go immediately right until you run into a pillar that's directly above you by one tile. From that pillar, go up until you see the rat NPC. Interact with the rat NPC to get the effect.
Pot (なべ)[]
Wears a pot.

Appearance: Tatsuki wears a pan on their head with a pot lid as a shield.
Passive Effect: None.
Action: (Shift) Tatsuki adjusts the pan hat.
Location: Found in Apartment Building.
Practical Uses: None.
Go to the Imagination Tiles World. Go north-west and enter the blue starry door. Go through the Starry Maze until you see another starry door. You'll end up in the Humid Grassland. Head two steps left, and go up until you see an red-orange monster with a long yellow eye. Interact with it to get the long white corridor. Go ahead to enter the Tatsuki's Apartment Building. Go up, left, up, right, up, right, up and open the door. Interact with the marking on the next door to get the effect.
Tuxedo (れいふく)[]
Wears a dress suit.

Appearance: Tatsuki wears a black tuxedo.
Passive Effect: None.
Action: (Shift) Makes Tatsuki bow.
Location: Found at Abandoned School.
Practical Uses: None.
Follow the Sewing Scissors effect guide, but, at the other school corridor, interact with the paper. The area will rust. Go to the very last door. Then go down and left. You'll see an headless figure over a pedestal. Interact with it to get the effect.
Beast (ほえる)[]
Becomes a beast.

Appearance: Tatsuki becomes a wolf-like black monster.
Passive Effect: None.
Action: (Shift) Tatsuki roars, causing all nearby NPCs to run away.
Location: Found at the Sea Bottom.
Practical Uses: None.
Go to the Phantom World. Go right until you see a fourth tree, then down to interact with the flower. On the next room, go up to reach the Phantom Tiles Area. Go to the left exit to arrive at the Sea Bottom. Go south until you see 8 red corals arranged in 4, side by side. Go down until you see the third blue set of rocks, then continue left and interact with the rusted metal thing to get the effect.
Hand Mirror (てかがみ)[]
Holds a hand mirror.

Appearance: Tatsuki holds a hand mirror.
Passive Effect: None.
Action: (Shift) Makes Tatsuki raise the mirror.
Location: Found in Snow World.
Practical Uses: Can be used to stop NPCs movement.
Follow the Beast effect guide to reach the 8 corals at the Sea Bottom. Go right until you see a hole and enter it. In the Water Maze go down, then right at the second fork, then up, right and down at the third fork. Go into the door and left. An event will happen. In the Snow World go south-east and interact with the moving arms to get the effect.
Bidoro (ビードロ)[]
Carries a Bidoro.

Appearance: Tatsuki holds a bidoro.
Passive Effect: None.
Action: (Shift) Tatsuki plays the bidoro.
- Note: While using the Bidoro effect, although rare, there is a chance that Tatsuki will blow too hard and break the Bidoro. The effect will be unusable for the rest of the dream; until Tatsuki wakes up.
Location: Found in Utopia Building.
Practical Uses: None.
|
|
Go to the Plant World. Go up and pass through a passage between two weeds. Go north-east and enter the white doorway. Go right on the next door. Upon entering, you'll see a purple humanoid-like figure holding what seems to be a bottle. Interact with it to get the effect.
Hole (るす)[]
Face becomes an empty hole.

Appearance: Tatsuki's face becomes a hole visible from both sides. Their normal outfit also becomes pink, and their hair becomes green.
Passive Effect: None.
Action: (Shift) Tatsuki stretches their face.
Location: Found in Enveloping Area.
Practical Uses: This effect allows Tatsuki to teleport to the Nexus at will.
Go to the Face Canal. Go left, down, right, down, right all the way, down, right, down, right and interact with the blob. Go ahead to get to the Forms World. Go north-west and enter another red arch between the green bunches. An event will happen and then you get the effect.
Desk Lamp (あかり)[]
Holds a desk lamp.

Appearance: Tatsuki holds a desk light.
Passive Effect: None.
Action: (Shift) Turns the lamp on/off.
Location: Found in Starry Maze.
Practical Uses: Can be used to illuminates dark areas.
Go to the Imagination Tiles World. Go north-west and enter the blue starry door. Go right, up, left, left, down and right. Interact with the shining gold colored creature to get the effect.
Rock (いわ)[]
Becomes made of rock.

Appearance: Tatsuki becomes made of rock.
Passive Effect: None.
Action: (Shift) A small hunk of rock falls from Tatsuki's head.
Location: Found in Crystal's Cave.
Practical Uses: Marks a spot with a small rock when the action is done.
- The Hand Mirror effect is recommended.
Go to the Purple-Black World. Go down and interact with the smallest pillar. At the Purple-Black Royalty Corridor interact with the light purple NPC, that located on the right from the Princess. Enter the door second from the right in the middle row of doors to reach the Cave Maze. Use the Hand Mirror effect and look for a floating green crystal that will teleport you to a room with a large crystal on the ground. Interact with it to get the effect.
Slime (とける)[]
Melts.

Appearance: Tatsuki becomes a small blue blob of slime.
Passive Effect: Halves Tatsuki's speed
Action: (Shift) Tatsuki wiggles up like a small pillar for a few seconds, then returns to puddle form.
Location: Found in Luxury Apartments.
Practical Uses: None.
Go to the Gray Ash Hole World. Go north-east and interact with an weird monster. On this new area go north-west and enter the door. In the Luxury Apartments go to the upper hall, on the door at the left, on the stairs. Inside will be a monster. Interact with it to get the effect.
Card (トランプ)[]
Turns into a card.

Appearance: Turns Tatsuki into a walking card.
Passive Effect: None.
Action: (Shift) Tatsuki flips the card and change suits.
Location: Found in Monochrome Room of the Hospital.
Practical Uses: None.
- The Desk Lamp effect is recommended.
Go to the Gray Eye World. Use the Desk Lamp effect and go left by 13 steps and up. When you see four walls, just go left until you see two hands. Pass between them. On the Gray Eyes Path go right until you see a third fork on the road. At this fork, go down all the way, follow the path and go between two colored hands. After passing two monochrome parallaxed maps you'll be at the Hospital. Go to the last door at the corridor and into the door at the next room. Interact with the hole to get the effect.
Gong (すりがね)[]
Carries a gong.

Appearance: Tatsuki carries a gong.
Passive Effect: None.
Action: (Shift) Tatsuki hits the gong, causing it to rain.
Location: Found at Violet Wetlands Village.
Practical Uses: None.
Follow the Upside-Down effect guide to reach the Grass House. There go right and even more right. In the White Hall go in middle doorway, then into the space between four holes to reach the Violet Wetland. Go south-east and pass between the four red sponges. Go on the south-right house and interact with the spark to get the effect.
Arm Clock (うでどけい)[]
Becomes a clock with arms for pointers.

Appearance: Tatsuki gains a clock with arms on their head.
Passive Effect: None.
Action: (Shift) Makes the pointer spin.
Location: Found in Flickering Colorful Room.
Practical Uses: None.
Go to the Face Canal. Go left, down, right, down all the way, left, down all the way, right and interact with the black twig. Go right all the way in the next 2 areas to get to the Desert World. Go left and enter the brown building. In the Blue Maze, go down 2 squares, right, down 2 squares, right and enter the doorway. On the building's top step on the flashing tile to go down into the City Street. Go left and enter the Aquarium. Go ahead through it, even in the room with the walking fridges to reach the Random Chance Corridor. When there will be shown 3 fingers, go to the middle path to get to the room with a ladder. Go up to enter to the Colorful Box Streets. Go left, down, left, right, down, left, left. In the Flickering Colorful Room interact with the crazed clock to get the effect.
Glass (ガラス)[]
Becomes made of glass.

Appearance: Tatsuki becomes made of blue glass.
Passive Effect: None.
Action: (Shift) Makes them shatter or become whole again.
Location: Found in Glass World.
Practical Uses: None.
Go to the Glass World. Go south-east into the giant corridor to enter the Face Corridor. Interact with the arm coming out of the wall. On Gray Eyes Path go down, right, down, left, then follow the rest of the path and interact with the glass to get the Glass Warping Maze. Go left, then follow the instructions: left, left, right, up, up, left, left, right, left, left to get again to a previously inaccessible part of Glass World. Interact with the melting blue glass to get the effect.
Eyeless (がんこう)[]
Both of eyes are missing.

Appearance: Tatsuki's eyes are missing, their eye sockets remain open and bloody.
Passive Effect: Tatsuki walks in random directions due to losing their sight while the effect is equipped.
Action: (Shift) Tatsuki wipes the blood from their eyes.
Location: Found in Pastel World.
Practical Uses: None.
Follow the Arm Clock effect guide to reach the Random Chance Corridor. When there will be shown 5 fingers, go ahead to get to the Pastel World. Interact with the dark red plant to get the effect.
Semi-Effects Guide[]
While these aren't actual effects, they do change Tatsuki's appearance and have the effect animation.
Rolling Chair[]

Similar to Yume Nikki, in Tatsuki's dream world you can ride the chair, but it decreases their speed.
Different Hairstyles[]
In the City Street you can enter a tent with four different statues that change Tatsuki's hairstyle until an effect is used, or they wake up.
Without Ponytail[]

Tatsuki's hair with their bandana, but not tied up in a ponytail.
Without Bandanna[]

Tatsuki's hair without their bandana, but tied up in a ponytail.
Without Bandana and Ponytail[]

Tatsuki's hair is let down without their bandana.
Short Hair[]

Tatsuki's hair without their bandana or long hair.
Events[]
Most events in Debris are random, or need a certain effect (usually the Sewing Scissors).
Cockroach[]
A random event when waking up is to find a cockroach running around Tatsuki's room. Getting close to it will cause their face to scrunch up, and walking over the bug kills it.
Spotlight[]
A random event that happens when entering the bed to dream. The screen goes completely black and a shining spotlight appears. The pattern of this spotlight may differ each time.
Broken Tatsuki[]
A Random event triggered by entering Tatsuki's bed in the Dream World until they is warped to a sparkling area with a girl in the middle, but faster way to go there is sleep in Tatsuki's dream room bed while using the Hand Mirror effect. Interacting with her teleports Tatsuki to another area with water and white fish running with legs. Keep going straight up to enter a cave. Tatsuki then climbs down a long ladder to a clearing with another Tatsuki, but with triangle holes. Talking or using the Sewing Scissors effect breaks this other Tatsuki, and after that you need to use the Hole effect or wake up to exit.
Reflection[]
Go to the Gray Eye World and walk about 9 steps towards West and then go straight down till you see a gray-outlined cross. Touch the middle part to enter the Limb World. Go south-east and kill the monochrome NPC using Sewing Scissors. When the environment changes, go back north-west and walkthrough the same arch that you spawned in. You will go to the Residental Area. Go UP - LEFT - UP - LEFT - UP and enter the sole brown door. In the next area, walk towards West and enter the brown door closest to the one you came out of. Go to the balcony to see Tatsuki's reflection. Interact without an effect to see a reaction and then with Sewing Scissors to see the event.
Static TV[]
A random event upon entering the Dream World, when interacting with the TV in their dream room, it has the chance to warp you to a very glitched world with invisible walls. Running around in this area is another Tatsuki without their bandana that is more transparent and ghost-like. The Tatsuki clone cannot be interacted with, and mirrors Tatsuki's movements. Unless you have the Hole effect, the only way to leave is to wake up.
TV Eye[]
A random event upon entering the Dream World, when interacting with the TV in Tatsuki's dream room, the TV has a chance to change into a station with only an eye on it. Interacting with this eye will make it laugh, and you cannot change the channel anymore.
Nexus[]
A random event that may occur without warning while standing in the Nexus. The Nexus pattern spins and glows for a short amount of time.
School Rave[]
Follow the instructions for the Sewing Scissors effect to get to the School, but go to the far right door with a red eye on it, a screen with many spinning patterns and rave music will play.
School Event[]
An event that was much more common in Version 0.05 of Debris but is now much more random and rare. First go to the School, and interact with the poster on the wall to turn the School into the Abandoned School. Then enter the room where you got the Sewing Scissors effect in the normal School. An event will show Tatsuki trapped in the center of the room with the screen wavering and they will get knocked to the floor. Some more thumping sounds can be heard and they is repeatedly starting to repeat in a glitched way (similar to a movie skipping) and eventually starts breaking up. They lies on the floor on their back, bloody, for a few seconds before splitting into pieces again. After the event ends, it forces Tatsuki to wake up.
Rising[]
Follow the instructions to get the Hand Mirror effect, but look for a square hole with lots of bubbles coming from it. Tatsuki is shown floating with a strong water current upwards. You can leave the event and go back to the underwater caverns.
Drowning[]
Follow the instructions to get the Hand Mirror effect, and through one of the underwater doors there will be an event of Tatsuki drowning, and then land in the Snow World. There is no way to get back to the Underwater Caverns.
Skydiving[]
Follow the instructions to get the Upside-Down effect, but explore all the doors until you come to a clearing with a table, two NPCs, and a view of outside. Simply walk up and interact with the view to show Tatsuki skydiving down. The event continues until you press X, and you return back to the clearing.
Clones in the Hospital[]
Follow the instructions to get the Card effect, but interact with the back to turn the hospital dark. The hallways should have changed, and keep going until you reach the far left door, then an area with many Tatsuki clones appear. The menu is inaccessible, and the door appears to be locked. After a few seconds, all of the Tatsuki's (including you) become wounded, most missing body parts such as legs, or arms. Your Tatsuki is without their torso, and their speed is slowed. The door is still locked, and eventually a mist covers the screen until Tatsuki is forced to wake up.
Glitch Menu[]
If you talk to the menu changing doctor in the Hospital, there is a random chance you will get a glitched menu instead of the normal ones. All text is almost impossible to read, the pattern is made of gibberish, and the menu sounds are distorted and loud. Talking to the doctor again should solve the problem.
Sky Elevator[]
Follow the instructions for the Arm Clock/Eyeless effect to get to the Blue Maze. Enter the passageway with a big blue bottle next to it, and step on the flashing blue rectangle. Tatsuki slowly descends to the marketplace with balloons along the way.
Punishment[]
While in the City Street, kill any stick-figure NPC with the Sewing Scissors effect. Immediately, pink birds will run at top speed at Tatsuki, and capture them. The screen goes black and various snipping, gurgling, and hacking sounds are heard, until the screen shows Tatsuki without their torso, sitting in a pool of blood in a cage with a marketplace NPC and various other NPCS surrounding him. Tatsuki then wakes up.
Nightmare Room[]
In the Cave Maze is a door frame that leads to a small room with another door that is either locked or unlocked (the chance is random, just keep re-entering this room until the door in unlocked) pots and pans hanging from the roof, and a single NPC. If you have the Pot effect, equipping it in this room causes the NPC to go for Tatsuki, and they take the Pot effect. The Pot effect then becomes inaccessible for the rest of that dream, but waking up regains the effect. Additionally, going through the locked door, if it is open, leads to a small space with hands, violent shaking and screaming.
Purple Princess[]
In the Purple-Black World go to the clearing with the purple princess and talking to her (the chance is random, just keep talking to her to trigger the event) and she will become tangled in thorns and roses while chasers appear. All connections to other worlds are closed off, so even with the Hand Mirror stopping the chasers, you need to wake up or use the Hole effect to get out. It should also be noted that using the Upside-Down effect while the princess is normal shows her with a big rose on her face for a second.
Hug[]
In the Blue Maze, there is one door that leads to an orange-pink small room with a big black stickman-like figure. Getting close and interacting with it triggers a fullscreen event of the figure embracing Tatsuki in a sort of hug, and Tatsuki then wakes up.
Glitched Room[]
The easiest way to access this is either follow the steps to the Purple Princess event, but head up into the next room, then down onto the Bridge Area or unlock the green door in the Nexus and head north east to the white flower. From here, head north and enter the staircase, then down into the next room. Heading back into the previous room will show it blocked off by blob-like creatures, From here, go right and onto the bridge. Interacting with the chaser (via the unfenced area) will show her true form, as if you were using the Upside-Down effect. After a few times, she will teleport you to what appears to be your awake room, but she will be blocking the door. You cannot interact with her. If you walk up to the bed, the screen with static, and, when the static ends, your room becomes glitched, and there will be chasers all over, but the do not move and cannot be interacted, leaving the bed as the only option. Interacting with it leads you to an empty black area, and the only way to escape is with the Hole effect or waking up. You can only trigger this event once per dream.
Rewind[]


Tatsuki at the beginning of the Rewind event.
To witness this event, you have to get either END1 or END3. When the game asks you if you want to continue playing, choose yes, then deselect all the effects and continue. From that moment on, you'll see many - more or less unsettling - scenes.
Once the event is over, Tatsuki will be back in their room with, aside from the instructions, nothing else but "Junk" in the effects list.
Behind the Door[]
Follow the instructions for getting the Pot effect. Once you've arrived in the Apartment Building, go left and take the second path that'll lead you to a single door. Unlike the other ones, interacting with it will make Tatsuki knock on it multiple times. When doing so, there's a chance that a big shadow will appear and abduct them, resulting in them immediately waking up.
Endings Guide[]
| Spoiler warning: Plot or ending details follow. |
|---|
After each ending, there is a small "Thank You" screen.
END1[]
Simply collect all 17 effects (on the menu it should say 18 though, because of the instructions being counted as an effect) and exit Tatsuki's room in real life. [Tatsuki is then shown sitting in a grassy field with the wind blowing, watching the afternoon sky and the clouds pass by.]
- To get Endings 2 or 3, you need to first unlock the red book with Lefia.
Collect all effects and then go to the Gray Ash Hole World, and afterwards head upwards or downwards directly from the door, and as long as you're below the smile you can walk left and see an eyed creature. Interact with the eyed creature, then go a little bit left and a bit up until you see a golden-bordered wooden door. Enter this door into the hall containing the room with the Slime effect. Go to the top of the stairs and equip the Hand Mirror effect. This will cause one of the doors to turn translucent. Go through the translucent door (and keep using the Hand Mirror effect, because two chasers will be waiting for you when you enter this door) and you should be in white and brown hallway with a red carpet and broken TVs. Keep going up to see a glitched up version of Lefia, and trigger a close up of her. She should disappear from the throne. Wake up, and you should see an open red book on Tatsuki's floor. Interact with it to play as Lefia.
END2[]
After getting the red book, don't complete Lefia's part and leave Tatsuki's room. [Tatsuki will then be outside along a forest-like path, if you keep going up then there is a small clearing with Tatsuki's corpse and what appears to be one of the chasers in her normal state on the floor. The camera then pans up to show the same scene from END1, but without Tatsuki sitting in the grass.]
END3[]
To view END3, go down the forest path instead of up. [The scene will change to Tatsuki looking at the red book for a few seconds, then change again; the final scene has Tatsuki sitting in the corner on their bed looking down.]
Lefia's Part[]
When playing as Lefia, you can enter her bed to save.
Menu[]
Belongings (もちもの) — View Lefia's current inventory, or view the instructions. Action (こうどう) part of the menu, you can go back to her room (へやたもどる), or Stitch (とじる) to return to Tatsuki.
As Lefia, you start out with many items in your inventory, and there are no effects to be collected in the book. Pressing the Action key will make her run faster. You can only go forward by interacting with the fluttering page at the corner of the bottom right, or the upper left to go back a page. Around the middle of each of these pages there is an empty toy box. Simply interact with all the toy boxes (You can take the items in and out of the toy boxes, a blue lid over the box means the item is in there), and at the final toy box Lefia's face darkens, and she starts to glitch out. As Lefia you go through what appears to be a very distorted version of Tatsuki's room, and leave though the front door. The book then closes, and you return to Tatsuki. Tatsuki shakes their head if you try to open the book again, and simply exit their room. From here Tatsuki holds their scissors, and Lefia stands blocking the path. You then have the option to keep going forward, or turn back. Turn back from where you came to view Ending 3.
END[]
There is also a fourth "true ending", where instead of turning back from Lefia blocking the path, [face her with the scissors. Tatsuki then stabs Lefia, who then bursts into flames and turns to ash. Keep going forward, and similar to ED2, you will see the same corpses. Tatsuki will step back a bit, then face the camera with a grin and their tongue showing. They then go back a bit, laughing, and runs all the way back. They are then shown holding Lefia's red book by a park with one of the calm chasers sitting on a swing set. The final screen has both of them walking down a road, but Tatsuki suddenly stops, drops the book, and charges at the girl with their scissors. They then start laughing again and runs off screen, and the screen darkens. When the screen is black, you hear some static and other sounds, and the game returns to the title.]